Stash Busting Flowers


0711181148


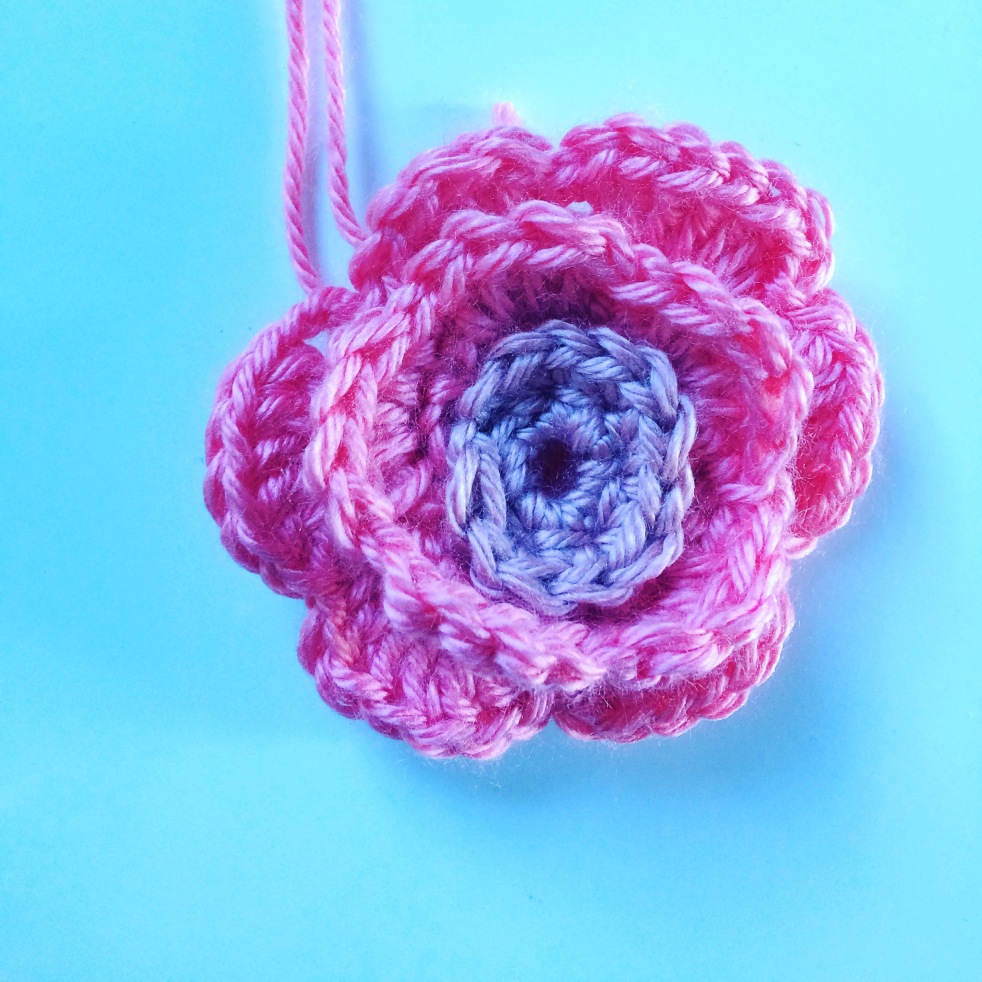
Do you have a bunch of little balls left over after projects? Maybe you made a shawl and you only have a ball that’s 1-2in wide and it’d be such a waste to throw it away, but seriously what are you going to do with that little amount? Well, I have a great solution for you! Flowers. Use them as motifs or Use them for Bookmarks(my favorite use of them!), or give one to a friend. But whatever you do with them, they’re super quick and easy to make.

What you’ll need :

US size I(5.5mm) crochet hook

Any scrap yarn, I used Worsted Weight.

Ch 3-4-5 connect in the round.
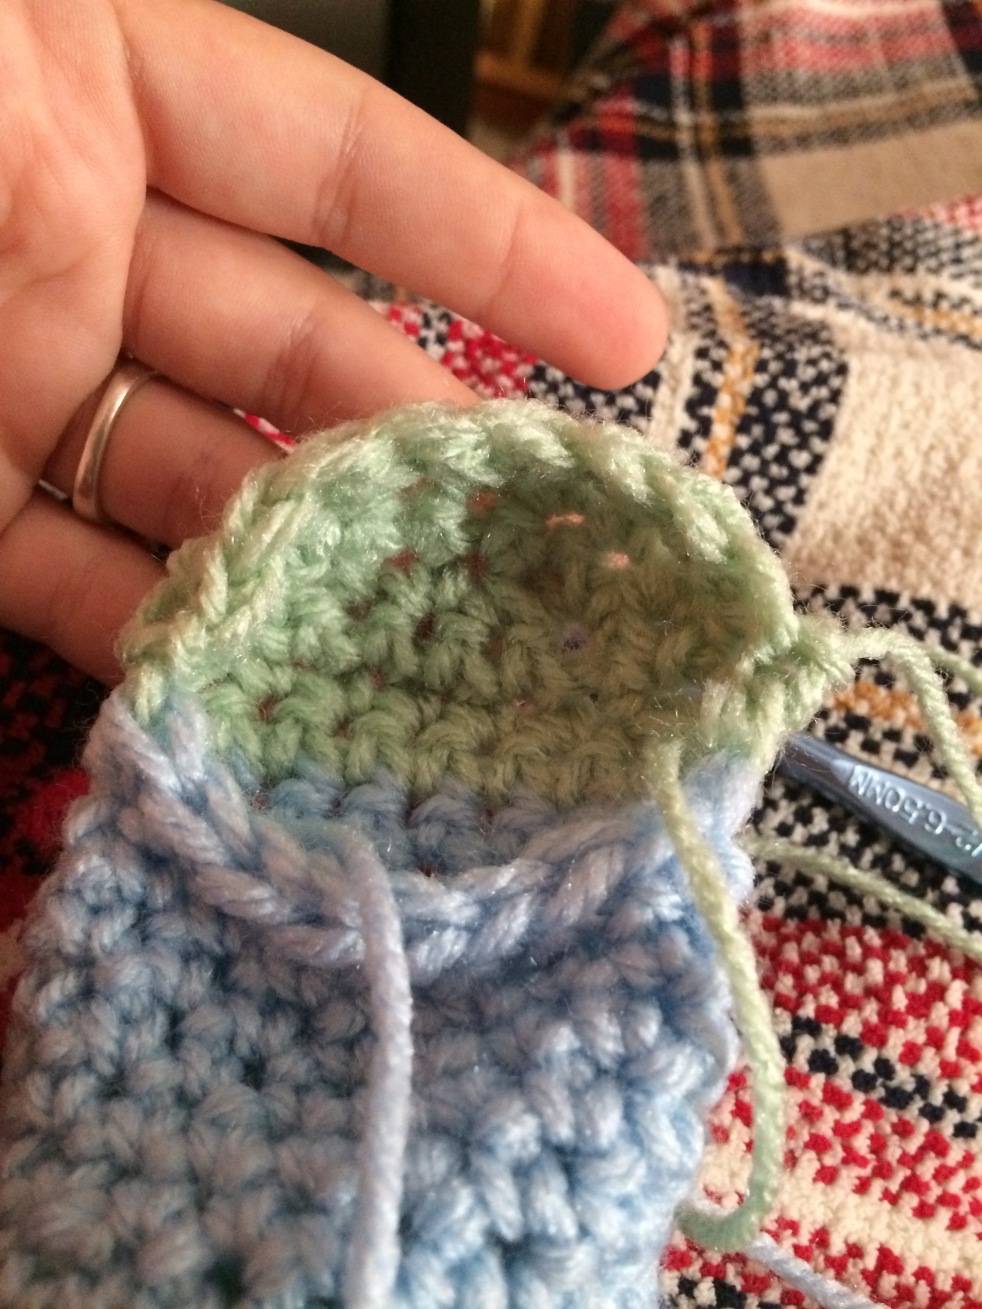
1)2SC in each 6-8-10
2)1SC,2SC around 9-12-15
Change colors.
3)Sl1 with new color, ch 3, *skip2, sc1*Ending with SC in first SC space.
4)Ch2, DC5-7 in chain space, Sl in SC from prev. row.  Repeat around(With the Chain)
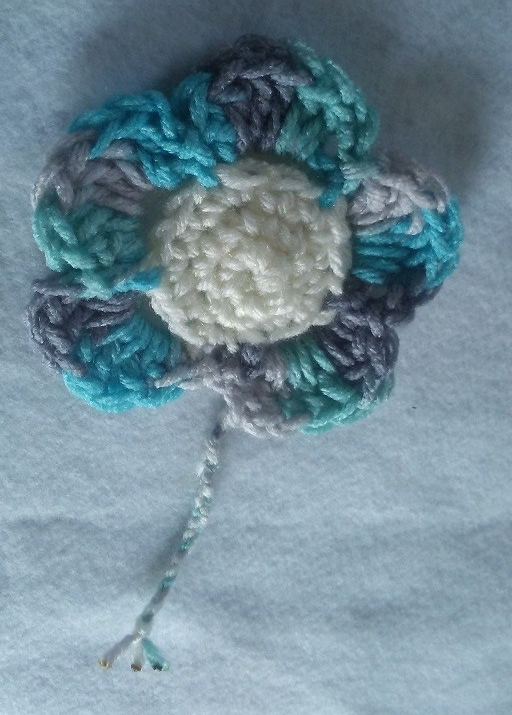
Bind off, weave in ends. You now have a flower. 🙂

0711181146b

Quick and Simple Stocking

B39A9670-2A69-4E8D-96B3-2FEB4A50F077.jpeg

We are less than a month away from Christmas and I’m not much of a Christmas person, but very much enjoy feeling festive. You can bet I had Christmas music playing singing loud and obnoxiously as the toddler ran and danced around while I worked these up. Early warning they’re super easy and quick once you get the heel down, and they’re addicting to make!!


For this tutorial I used a smaller K hook and DK weight yarn, but this pattern using correct materials will create a standard sized Stocking.


What Yule Need:

2 Colors of Super Bulky Yarn, I recommend full skeins especially for the Main Body Color.

Size N hook(9mm)

Yarn or Embroidery Needle


Toe:

You will start with Magic Circle cast on(If you are like me and the magic circle hates you ch3 and connect.)

Round 1: SC6(6)

Round 2: SC2 in sc from last round(12)

Round 3: SC1, SC2 in SC from last round(18)

Round 4 & 5: SC around (18)

F64BD3DF-4BBA-4AB4-ADA1-ADF27BF68CF2

The toe is complete and you can now change colors if you want the body of the stocking to have different colors from the Heel and Toe.

IMG_0886

Rounds 6-12: SC.

HEEL:

Change colors.

This is the tricky part and I will eventually get around to making a video to demonstrate. The heel is worked back and forth with a decrease first and then an increase and connection.

Row 1: SC9, Ch1 turn(9) Carry your main body color under your stitches so it’ll be there to pick up when the heel is finished.

C8662D59-74CB-482C-B5FF-7E32525A6A01

Row 2: Dec1, SC5, Dec1, Ch1 turn(7)

Row 3: Dec1, SC3, Dec1, Ch1 turn(5)

Row 4: Dec1, SC1, Dec1(3)

Here is the tricky part you will Slip into the side stitch one Row back, Ch1,Turn.

IMG_0888

Row 5: SC into slip stitch, Sc 3, then SC into the side one row back. Slip into row underneath last. Ch1 turn.(5)

IMG_0889


Row 6: SC into slip, SC5,Sc Into second to last row. Slip into bottom row, ch1, turn.(7)

Row 7: SC into slip, SC 7. SC into last row.(9)

900D3BBF-9D31-4039-84BB-1CA496FAFD78

If you changed colors for the heel and toe now is the time to change back into body color.

B968883E-A540-4E39-BE3F-4E6D73441778

Round 13-30: SC around.

IMG_0897

If you want to add a cuff add 6 or 7 rounds and fold. You can pin it down so it doesn’t come off with your tail. Weave in Ends, and you have a Stocking ❤️.


Easy Peasy Headband/EarWarmer

IMG_0687

Cold weather is on its way and this  is the perfect thing to have to keep your ears warm while looking super cute!!

This knitted headband works up super quick, you can make it as thick or thin as you want, but the last stitch must end in a purl, for this I recommend using an even number of stitches. Make sure you make it a little short so it fits a little snug or when it loosens from wear it won’t fit.

You can make this headband as thick or thin as you’d like! I have made several thin, but as an ear warmer especially you’ll want it chunky.

What you will need:

Worsted weight yarn I’m using Caron Simply Soft in Colorway Victorian Rose.

US size 6(4.25 mm) knitting needles

Scrap yarn of contrast color to use as Life Lines.

Measuring tape to measure your head.

HEADBAND

Using the long tail cast on, CO 22

Row 1: Sl1 kwise, k20, p1

Row 2: Sl1, *P1,K1*, ending with a purl
Continue working 1×1 rib until desired length

IMG_0652.JPG

You can use life lines in case you drop a stitch and don’t have to frog back!

For help withe placing Life Lines you can check out This Post

Sew ends together using tail from the cast on or bind off, weave in ends.

Snapseed

Connecting piece.

CO 16

row 1: Sl1 kWise, K14, p1

row 2: Sl1 kwise, *P1,K1* ending with Purl

repeat row 2 until it’s able to easily wrap around width of headband. I usually make this piece just longer than the width of the headband.

Snapseed

Bind off.

I Like to shape the headband before sewing everything together and for this I always leave a long tail from binding off, ans I wrap it around where the connecting piece will go. Snapseed

Wrap the connecting piece around the width of the headband and sew it together on the backside of headband so you cant see the seam.

Weave in ends and wear!

IMG_0705.JPG

Placing a life line

Sometimes you make a tedious project, or lace, or maybe even cables, then you lose your place on the project you’re working, or you drop a stitch(Knock on wood!) but you get frustrated and have to frog ALL that hard work you just did!! Well fret no more life lines are your answer!

I use them on almost every project. I place 3, one every 6-10 rows, and roatate the one on the bottom to the top once a new one is needed.

First you make your rows, Here I’m on Row 8. IMG_0544


First you take a tapestry or Yarn needle and thread a lighter weight yarn of contrasting color and thread the yarn theoigh the needle.

Then you will insert the needle(I find its easier if it’s bent and I have bent mine) into the open stitches on your needle. IMG_0545

Pull the thread through, doing a few stitches at a time. Being careful not to pull the end through. I tie a knot so it’s harder to pull through.

IMG_0546

Once you have all stitches done, make the thread even on both sides and you can go back to knitting.

IMG_0549

14 Stitch Cable Scarf

This is a very ease Cable pattern, perfect for beginners, or someone who is still getting comfortable with cables. This pattern is a six row repeat with cables on the last pattern row. This pattern features a thick Single Ascending Left Twist with a Garter and Ribbed border. I decided to not make a border at the ends,as I am going to sew my ends together making an Infinity Scarf.

For a tutorial on cables check out my other post Here

What you will need:

2 Skiens of Lion Brand Yarn Wool Ease Thick and Quick I used Colorway Wild Strawberry .
 

Size US 15(10 mm) knitting needles

A cable needle/DPN/Straight needle. I recommend Size US 8(4 mm) if you are using Straight or DPN.

Row counter or pen and paper to keep track of which row you’re working.

Abbreviations:

K = Knit  P = Purl   C6F = Cable 6 Front

Cast on 14

Border Row 1: K1, P1 until end of row.

Border Row 2: P1, K1 until end.

Border Row 3, K1, P1 until end.

*Pattern Row 1: K2, P1, K1, P6, K1, P1, K2

Row 2: K3, P1, K6, P1, K3

Row 3: K2, P1, K1, P6, K1, P1, K2

Row 4: K3, P1, K6, P1, K3

Row 5: K2, P1, K1, P6, K1, P1, K2

Row 6: K3, P1, C6F , P1, K3 *

IMG_0425

*Repeat pattern rows 1-6 until desired length

Border Row 1: K1, P1, until end

Border Row 2: P1, K1 until end

Border Row 3: K1, P1 until end.

IMG_0303

IMG_0645.JPG

CONGRATULATIONS!! You just completed A Cabled Scarf!

Cables for Beginners

This week I’d like to discuss Cables. They look difficult, they’re gorgeous, but SUUUPER simple. As one very awesome Lady told me, trust your pattern. But if you’re anything like me they can seem difficult and a bit confusing.

My biggest issue with cables was twisting the stitches and not knowing which order to knit them in, but using a straight needle as your cable needle fixes this problem and once slipped back onto your working needle, you wont have to worry about which order they go in.

To start off you will need The needles you plan to knit with, for this lets say size US 8(5 mm) and 1 straight or double pointed needle a few sizes smaller, I’d go with a US 5 (3.75 mm) or even a US 6(4.25mm). I absolutely recommend using a straight needle until you are completely comfortable with cables. This also prevents the stitches from falling off your needle like they would with a DPN.

Now you will start by casting on 14 stitches. We will be working a Cable 6 Front or C6F. This makes a cable that moves to the left.

Knit a few rows in Stockinette. Row 1 knit, row 2 purl, row 3 knit, row 4 purl, ect.

On your next Knit row you will knit 4, Now we will do the C6F. Slip the next 3 stitches onto your DPN or straight needle and keep them in the front of your work(this makes the cable turn left, putting it in the back would make it turn right).

Next knit the next 3 stitches. Now without twisting the stitches on your cable/Straight/DPN place them back onto the  left needle and knit them.

IMG_0260.JPG
You can see the twist when the stitches are placed back onto the left needle. 


Next knit the remaining stitches.

Your next row you will purl, and now you have completed a cable.  Practice this way for a while, cabling  your knit row after 5 rows of stockinette.

I will have my 14 Stitch cabled scarf up soon. It’s huge and fluffy and perfect for a beginner cable pattern.


Crochet Hippy Girl Headband

This is a very easy and quick project you can do with just about any scrap yarn. I used Red Heart with Love in colorway Delightful for the bands themselves.

For the flower motifs I used Caron Simply Soft, Color Ways Vintage Rose, Strawberry, and Autumn Maize.

You will need 2 hook sizes.  A size G 4.25mm and a size F 3.75mm.


Band:

Using your F hook  and Red Heart with Love or any worsted weight yarn,

Tightly Chain 90 (or as many as it takes to wrap around your head. Knot it off leaving at least 6in length for tying. Make a second the same length. Once the two are finished tie them together and leave all ends loose.

Flower:

Using G hook and Caron Simply Soft or any sport weight yarn,

Chain 20+1(Or if you want a smaller/larger flower 4 chain +1)

Row 1: chain additional 3 Skip 3 from original chain, single crochet into the 4th chain. *Ch3, SC1* repeat until the end.

turn your work

Row 2: Ch3(This is your First Double Crochet) DC5 into the chain space, Sc on top of previous rows SC, *DC6 into Chain space, SC on last rows Sc* repeat until end.

Tie off.

Connect the first and last petal by weaving in ends.

I made 2 flowers one smaller (and off count) than the other for myself, and for the toddler I used a single flower. It’s up to you, but definitely less work with the one!

You can either Use a contrast color for the center of the flower, or use the same.

Rnd 1: Magic circle sc6; OR

Ch3, slip stitch in first ch to make a circle. SC6 into chain space.(6)

Rnd 2: SC2 in each SC from previous Rnd.(12)

Rnd 3: Sc1, Sc2 in same Sc space. (18).

Tie off leaving 10in to sew into flower.(I sewed into the chain of the flower)

IMG_0180

(Caron Simply Soft Colorway Strawberry and Vintage Rose)


TADA! You just made the easiest Flower motif ever!!!!

Now sew(or weave and tie) in flower to bands. This is where those loose ends come in handy I just tied all those loose ends together to make it secure, then cut and used a lighter to melt the ends together(!!!!!ONLY WORKS WITH SYNTHETIC FIBER YARN!!!!!!)

and Now you are now the owner of a fabulous Hippy Girl Head Band! GO YOU!!